Guide
House Construction Checklist for Bangalore Plot Owners
A stage-wise house construction checklist for Bangalore — from soil report and approvals through structure, MEP, finishes and handover.

Quick summary
A stage-wise house construction checklist for Bangalore — from soil report and approvals through structure, MEP, finishes and handover.
Key takeaways
- A Bangalore house checklist must cover title, authority, soil, sanction, structure, waterproofing and OC — not only finishes
- Confirm soil and setbacks before foundation design; do not reverse that order
- Tie every major payment to verified work, not to optimism or verbal progress
- Photograph concealed stages and insist on flood tests before covering wet areas
- Treat approvals and handover documents as part of construction, not paperwork for later
Why a stage-wise checklist matters more than a single to-do list
Building a house on a Bangalore plot is not one decision followed by a long stretch of waiting — it is a sequence of linked decisions, each of which either protects the next stage or quietly undermines it.
Owners who treat construction as a single project with a start date and a finish date often discover, halfway through, that a soil report was never commissioned, that setbacks were assumed rather than measured against the sanctioned plan, or that payment milestones were never tied to verified work.
A practical checklist does not replace an architect or structural engineer. It gives a first-time plot owner a way to know what must be confirmed before money and concrete move forward.
Bangalore adds its own constraints. BBMP and BDA jurisdictions, khata status, monsoon timing, and highly variable soil across Whitefield, HSR Layout, Hebbal, and south-east corridors all change what “ready to build” actually means.
A residential construction programme that ignores approvals, drainage, and foundation design until excavation day is already behind.
This guide walks through a house construction checklist organised by stage — from plot diligence through design, sanctions, structure, finishes, and handover — so you can verify readiness rather than hope for it.
Before you commission design: plot and title diligence
Most expensive mistakes start before drawings exist. Confirm whether the plot sits under BBMP, BDA, BMRDA, or a panchayat planning regime, because the approval path, setback norms, and documentation differ. Verify khata type and whether conversion (if agricultural) is complete.
Ask for the latest survey sketch, site dimensions, road width, and any road-widening reservation that could shrink usable setbacks. Walk the plot after rain if possible — standing water and neighbouring drain directions tell you more about site preparation cost than a dry-day visit.
Title diligence belongs on the same checklist as engineering. A clean-looking plot with unresolved boundary disputes, incomplete conversion, or an outdated survey sketch becomes a construction delay the moment the architect tries to lock setbacks.
Engage a property lawyer early enough that their findings can still change which plot you buy or how you brief the designer.
Comparing two plots only on locality prestige — Whitefield connectivity versus HSR convenience, for example — without comparing documentation quality is how owners accidentally purchase a planning problem.
| Item | Detail |
|---|---|
| Khata status | A-khata or B-khata confirmed in writing, with conversion papers if required |
| Planning authority | BBMP, BDA, BMRDA or panchayat identified before design brief |
| Site survey | Boundaries, road width and levels measured, not estimated from brochure |
| Encumbrance and title | Recent EC and sale deed reviewed by a property lawyer |
| Utilities access | BESCOM, BWSSB or tanker/septic reality checked for the locality |
| Neighbour conditions | Compound walls, drains and existing levels that affect your plinth |
Design brief and drawings: what must exist before sanction
A usable design package is more than a pretty floor plan.
You need architectural drawings that respect setbacks and FAR or floor area limits for your zone, structural drawings sized for actual soil data, and a schedule of areas that matches what you intend to build — not what marketing language vaguely implied.
Decide early whether you want a turnkey residential construction engagement or a labour-contract model, because the drawing package, BOQ depth, and site supervision expectations differ.
Do not freeze interiors before column and beam positions are fixed. Bangalore owners routinely pay for redraws because furniture layouts were approved before the structural grid existed.
Sequence it correctly: site data and soil report, architectural massing and setbacks, structural scheme, then detailed interiors and MEP shafts.
If you already use a construction cost calculator for budgeting, feed it the same built-up assumptions the drawings will carry into sanction — mismatched area definitions are a quiet source of later arguments about what the rate covers.
| Item | Detail |
|---|---|
| Soil report | Confirm before foundation design, not after excavation begins |
| Setback check | Match sanctioned norms to actual measured plot, not assumed dimensions |
| FAR / coverage | Reconcile proposed built-up area with zone rules before detailed design |
| Structural drawings | Columns, beams, slabs and foundation type signed by a structural engineer |
| MEP shafts | Electrical, plumbing and drainage routes reserved before brickwork starts |
Checklist
Approvals and statutory checklist
Plan sanction is not a formality you chase while pouring footings. Starting work before sanction is finalised risks stop-work notices and costly redesign if the approved plan differs from what was already built.
For BBMP and BDA areas, assemble drawings, ownership documents, tax receipts, and any NOCs your architect flags early.
Track application completeness carefully — incomplete files are usually returned for correction, which restarts waiting time rather than producing a clean rejection you can learn from.
Build occupancy certificate and completion documentation into the end of your programme from day one. Owners who treat OC as optional paperwork discover the cost later during resale, mortgage, or utility formalities.
Your checklist should name the person responsible for filing, chasing, and storing every approval letter — not leave it as a shared assumption. Keep a simple register: document name, submission date, authority reference, current status, and next action.
That register is as useful as any site photograph when a clerk asks for a paper you thought someone else held.
Where plots sit near authority boundaries or in recently annexed areas, double-check which office actually processes your file. Owners sometimes prepare a BBMP-oriented set only to discover the controlling process differs, losing weeks. Your architect should confirm the pathway in writing before the sanction clock starts in your head.
Pre-construction site readiness
Before excavation, confirm temporary power and water, labour welfare arrangements, material storage space, and how monsoon runoff will leave the plot without flooding neighbours.
Bangalore’s rains punish poorly planned sites: excavated pits fill, access roads turn to sludge, and curing quality drops when water management was never designed.
If your programme overlaps June–September, schedule waterproofing and external plaster with realistic buffers rather than optimistic dry-spell assumptions.
Mark setbacks physically on site from the sanctioned drawings, not from memory of the architect’s presentation. Peg corners, verify diagonals, and reconcile any mismatch with the survey before the excavator arrives.
A fifty-millimetre error at boundary marking becomes an expensive argument once footings are cast. Agree spoil disposal routes and neighbour protection measures in writing — especially on tight urban plots where trucks, dust, and vibration are part of the daily reality.
| Item | Detail |
|---|---|
| Temporary power and water | Arranged before excavation crew mobilises |
| Boundary and setback marking | Pegged on site against sanctioned drawings |
| Excavation plan | Depth, disposal route and neighbour protection agreed in writing |
| Monsoon buffer | Exterior and curing activities scheduled with seasonal slack |
| Safety basics | Barricading, helmets and access control treated as non-negotiable |
Process
Foundation and structural stage checks
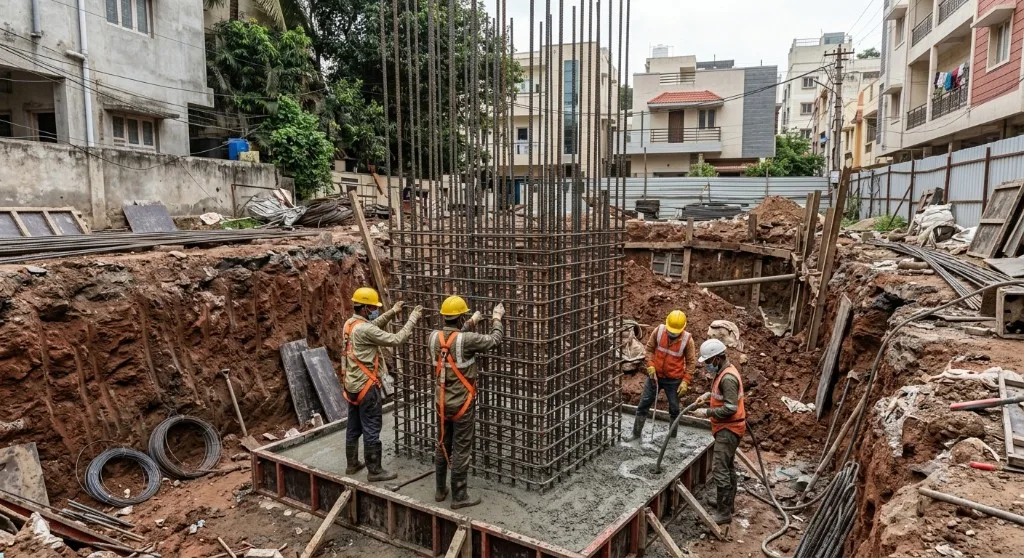
This is where checklist discipline saves the most money. Verify that excavation depth matches the structural drawing, that PCC and footing dimensions are measured before concrete, and that reinforcement matches the bar bending schedule — diameter, spacing, cover, and lap lengths.
Ask for cement and steel grade documentation. Do not allow the next floor’s formwork to proceed without a documented engineer review of the previous pour’s key points, especially cover and curing.
Ready-mix versus site mix is a project decision, not a slogan. Where RMC is feasible, batch control usually improves consistency; where it is not, insist on measured batching rather than shovel reckoning. Curing is not optional calendar padding — it is part of structural quality.
Pressure to “keep the site looking busy” is how inadequate curing enters otherwise careful projects. On multi-storey houses, treat each slab as its own gate: cast, cure, inspect, then release the next payment and the next formwork cycle.
Photograph reinforcement before every major pour. Owners do not need to interpret every bar, but a dated photo set becomes invaluable if a dispute later questions whether a detail was followed. Pair photographs with the engineer’s short written note rather than relying on chat messages that scroll out of sight.
Envelope, waterproofing and services
Brick or block work should follow openings and level lines from drawings, not improvised site judgement. Waterproofing at bathrooms, balconies, and terrace junctions needs product specification, surface preparation, coat count, and a flood test before tiling.
Electrical and plumbing rough-ins must be photographed before plaster closes the walls. Bangalore monsoon exposure makes terrace slope and parapet detailing non-negotiable checklist items, not finishing-stage afterthoughts.
Coordinate MEP before walls close. Chasing deep grooves into finished brickwork to correct forgotten conduits wastes material and weakens plaster.
Confirm that shaft sizes match the service drawings, that cleanouts remain accessible, and that hot-water loops and AC drain points exist where the final layout needs them.
If interiors will be a separate contract, freeze civil provisions for kitchens and wardrobes early enough that the residential construction team is not guessing.
| Item | Detail |
|---|---|
| Wall material | Grade and delivery quality checked against specification |
| Waterproofing | Flood test witnessed before screed or tile covers the membrane |
| Electrical rough-in | Circuit plan followed; boxes aligned before plaster |
| Plumbing pressure test | Completed and recorded before concealing lines |
| Terrace slope | Falls verified toward outlets before waterproofing finishes |
Finishes, snagging and move-in readiness
Finishes amplify every earlier error. Confirm substrate dryness before paint, tile flatness and slope in wet areas, door hardware operation, and that fixtures match the approved make list — not a silent substitution.
Build a snag list room by room with photographs; do not accept a single verbal walkthrough as handover. Check external works that owners often forget until move-in week: compound wall alignment, gate operation, driveway levels, and drainage away from the plinth.
Before you declare the house ready, revisit approvals. Confirm which documents you hold, which filings remain, and who owns each pending action. A beautiful interior with incomplete statutory paperwork is still an incomplete project in practical terms — banks, buyers, and utility offices are unmoved by paint quality.
Watch out
Common mistakes
- Buying or designing without confirming planning authority, khata and measured setbacks
- Skipping soil investigation and copying a neighbour’s foundation type
- Starting excavation before plan sanction is fully in hand
- Paying against calendar dates instead of verified structural or finishing milestones
- Skipping flood tests and photographing concealed MEP work
- Treating occupancy certificate and as-built drawings as optional post-move-in chores
What to do next
Print or share one master checklist with your architect, structural engineer, and contractor, and assign an owner for each line.
If you are still shortlisting builders for residential construction, ask each bidder to show how their stage gates map to this sequence — soil, sanction, foundation sign-off, waterproofing test, and documented handover.
Use a construction cost calculator to set a realistic envelope before finish selections harden. Then schedule design and sanction timelines honestly against monsoon months rather than promising yourself an unrealistically early move-in.
Review the checklist at every site meeting; a list that lives only in an early email is not managing the project.
Frequently asked questions
Start before you finalise the contractor — ideally at plot feasibility. Soil investigation, setbacks and authority confirmation belong on the checklist before excavation.
Yes. The contractor programme tracks site labour. Your checklist tracks decisions, documents and verifications you must not skip — even when the site looks busy.
The construction stages are similar; the approval documents differ. Confirm which authority governs your survey number and keep that authority’s document list on the checklist.