Guide
Excavation to Plinth: Owner Checklist
What Bangalore homeowners should verify from excavation through footing, pedestal, grade beam and plinth before superstructure rises.
Quick summary
What Bangalore homeowners should verify from excavation through footing, pedestal, grade beam and plinth before superstructure rises.
Key takeaways
- Excavation-to-plinth is a quality-critical window, not just site clearing
- Founding level, reinforcement, cover, and curing deserve documented checks
- Backfill compaction and anti-termite records matter as much as visible concrete
- Continuous damp-proof and external drainage details protect the ground floor
- Photograph and file stage evidence before the next trade covers the work
Why the excavation-to-plinth window decides so much of a Bangalore build
From the first cut of excavation to a completed plinth, a Bangalore house moves through its most consequential early construction sequence.
Mistakes here are expensive to reverse: wrong levels, inadequate compaction under footings, missing anti-termite treatment, poor plinth beam detailing, or a damp-proof course that was never properly continuous.
Owners often visit sites more during finishing, when rooms look like rooms, and visit less during this muddy, technical phase — exactly when disciplined checking protects the building for decades.
Bangalore adds local pressures to this stage. Compact plots mean excavated earth has nowhere convenient to go. Neighbour compound walls sit close to excavation edges. Monsoon weeks can flood open pits overnight.
Groundwater can appear after a few metres even when the surface looked dry. Structural RCC work at footing and plinth level sets the geometry for every column above, so dimensional errors compound floor by floor.
This checklist is written for owners and owner-representatives who want a practical inspection rhythm without pretending they can replace the site engineer.
Use this article as a stage guide for residential construction and for rebuild projects where an older structure is cleared and a new foundation begins.
Where renovation work later touches ground-floor dampness or settlement, many of the same plinth principles explain why the original house is failing — but new excavation still needs its own sequenced checks.
Before excavation starts
Do not treat mobilisation day as the first quality gate. Before machines arrive, confirm that plan sanction status allows work to begin, that the structural drawings match the soil report recommendations, and that boundary verification is complete enough to trust set-out lines.
On Bangalore plots, an unresolved boundary dispute discovered after excavation has already undercut a neighbour's wall is a project-stopping event. Mark trees to retain, overhead lines, and underground utilities where known.
Agree where excavated soil will be stacked or removed daily — many dense wards simply cannot store a full excavation heap on plot.
- Verify sanctioned plans and structural drawings are the versions issued for construction
- Confirm foundation type and depth match the soil investigation recommendations
- Check boundary stones or survey set-out against the architect's site plan
- Photograph adjoining structures and shared walls before excavation vibration begins
- Agree spoil removal logistics and neighbour notification where cuts are close
- Confirm temporary electrical and water arrangements for the foundation stage
Excavation and formation levels
Excavation should reach the design founding level shown on structural drawings, not an approximate depth guessed from a neighbouring house. On rock or hard strata, over-excavation and then filling with loose soil is a common shortcut that undermines bearing assumptions.
On soft or filled ground, the engineer may require removal of unsuitable material beyond the nominal footing depth. Owners should ask the site engineer to confirm founding strata visually against the soil report description before reinforcement for footings is fixed.
Side slopes or shoring matter on deep pits and on cuts near boundaries. Vertical unsupported cuts in Bangalore's mixed soils can collapse after rain or overnight drying and wetting cycles. Keep a clear edge distance from neighbour walls unless engineered shoring is in place.
Water accumulating in the pit should be managed deliberately — pumping without a plan can soften the founding surface, while leaving standing water overnight can contaminate the formation.
Footings, columns starter bars, and curing
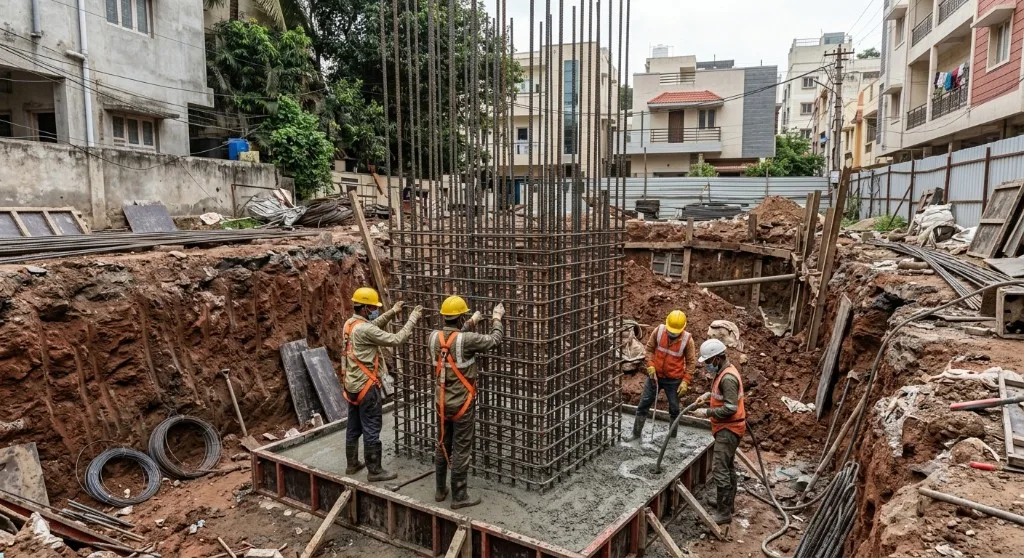
Footing reinforcement must match the bar bending schedule: bar diameters, spacing, mesh layers, and cover. Cover blocks should be dense concrete or approved spacers, not random stone chips that crush or displace.
Column starter bars need correct lap lengths, positions matching the grid, and temporary bracing so they are not bent out of line by workers climbing through the cage.
Concrete grade and slump should match the specification; for structural RCC at foundation level, ready-mix with delivery tickets is easier to verify than informal site mixing on constrained plots.
Curing begins as soon as finishing allows. Hot Bangalore days dry exposed concrete quickly. Neglecting curing at footing level is invisible later but reduces near-surface durability. Keep records of pour dates, truck tickets where used, and cube sampling if specified.
Do not backfill against green concrete simply to make the site look tidy for a weekend visit.
| Item | Detail |
|---|---|
| Founding level | Excavation depth and stratum match structural and soil recommendations |
| Reinforcement check | Bar sizes, spacing, and laps match the bending schedule |
| Cover | Spacers maintain specified cover on all faces before pouring |
| Concrete grade | Mix or RMC tickets match the specified structural grade |
| Column starters | Positions align to grid and remain plumb after pouring |
| Curing | Moisture retention continued for the specified early-age period |
Backfilling, anti-termite treatment, and under-floor preparation
Backfilling around footings and up to plinth should use approved material in compacted layers, not random construction debris. Poor compaction shows up later as settlement of ground-floor floors and external paving.
On many Bangalore residential sites, termite treatment is specified at foundation and plinth stages; ask for the chemical, dilution, and application record rather than accepting a verbal "treatment done." If a plastic sheet or other vapour barrier is specified under ground-floor slabs, confirm continuity and overlaps before concrete or screed covers it.
Service sleeves that must pass through plinth beams or ground-floor slabs should be cast in position rather than chiselled later. Coordinating plumbing and electrical entry points at this stage avoids weakening structural members during renovations-style hacking after the fact.
Plinth beams, plinth filling, and damp-proof course
Plinth beams tie the structure at a level that resists differential movement and provides a platform for ground-floor walls. Reinforcement, beam soffit levels, and bearing on footing stubs or columns must follow drawings.
After plinth beam concreting and curing, plinth filling and compaction prepare for the ground floor.
The damp-proof course (DPC) or equivalent moisture barrier detail must be continuous where specified — breaks at door openings and poorly lapped sections are classic paths for rising damp in Bangalore's wet months.
External ground levels matter as much as internal plinth height. Finished external ground or paving should fall away from the building so monsoon water does not pond against the plinth. On plots that sit lower than the road, discuss drainage explicitly rather than assuming the plinth height alone solves water ingress.
Checklist
Owner checklist from excavation to plinth handover
- Photograph each footing pit before reinforcement and again before concrete
- Witness or request documented checks of reinforcement against drawings
- Collect RMC tickets or batch records for footing and plinth pours
- Confirm anti-termite application records if included in the specification
- Verify plinth level against road and neighbour reference points
- Check that DPC or moisture barrier details are continuous before wall work rises
- Ensure external drainage slope intent is clear before backfill is finished
Watch out
Common mistakes from excavation to plinth
Rushing excavation during heavy rain without protecting formation levels is a frequent Bangalore mistake. Another is backfilling with mixed debris to save disposal cost.
A third is pouring footings without confirming cover and starter bar positions because "the fabricator knows." A fourth is treating plinth as a cosmetic line rather than a structural and moisture-control stage.
A fifth is starting ground-floor wall work before plinth concrete has had adequate curing time. A sixth is ignoring neighbour wall risk until a crack complaint arrives.
- Excavating to an assumed depth instead of the drawing and soil founding level
- Using debris-laden or poorly compacted backfill around foundations
- Skipping documented reinforcement checks before footing concrete
- Omitting or breaking continuity in damp-proof details at plinth
- Leaving monsoon water unmanaged in open excavations
- Starting masonry on green plinth concrete under schedule pressure
Monsoon and neighbour interfaces during foundation works
Bangalore's monsoon does not pause because your footing schedule is aggressive. Open excavations collect water quickly, and formation soils that were firm at noon can soften overnight.
Plan temporary bunds, pump discharge routes that do not flood a neighbour's compound, and cover freshly cast concrete against heavy showers.
If a pour is interrupted by rain, the site engineer should decide whether to continue under protection or stop cleanly at a construction joint — owners should not pressure crews to "just finish" in conditions that trap laitance and weak layers into structural RCC members.
Neighbour interfaces deserve equal discipline. Document pre-existing cracks in adjoining walls with dated photographs. Keep excavation edges outside the influence zone of neighbour footings unless a shoring design is in place.
Vibration from breakers used to remove old foundations on rebuild sites can travel; sequence noisy work within reasonable hours and keep a direct contact channel for complaints. Most disputes at this stage start as courtesy failures, not as sudden structural mysteries.
Daily owner questions that keep the site honest
- What founding stratum was exposed today, and does it match the soil report description?
- Which drawings and bar-bending marks were checked before the latest pour?
- Where is excavated spoil going, and is backfill material approved?
- What is the curing method for yesterday's concrete through the next 48 hours?
- Has any groundwater or rainwater changed the formation since the last inspection?
Process
How this stage connects to later work
Everything above plinth inherits the geometry and moisture logic established here. Structural RCC columns continue from starter bars set at footing and plinth. Ground-floor flooring finishes depend on compacted filling and dryness.
Years later, when homeowners plan renovations to fix skirting dampness or uneven ground-floor tiles, the investigation often returns to plinth detailing and external drainage that were rushed at the beginning. Investing attention now is cheaper than forensic repair later.
Frequently asked questions
Yes in almost all cases. Digging before sanction risks stop-work notices if the approved plan differs from what was excavated.
Excavation depth markers, PCC, reinforcement placement with cover blocks, and pour date. Photos are your record once concrete covers the steel.
When structural members up to plinth are cast as designed, plinth beam (if specified) is complete, and backfilling/compaction follows the engineer’s notes — not when mud is simply pushed back.